If you’re anything like us and find yourself captivated by the art of bonsai, you’ve probably wondered about the techniques that make these miniature trees look so striking. We’ve been working with bonsai for a while now, and while pruning plays a role, wiring a bonsai tree has truly become our secret weapon.
When we first started using wire, it seemed like a small detail, but we quickly saw the difference it makes.
Wiring lets us guide each branch to create those beautiful shapes you see in well-crafted bonsai, whether it’s a sweeping curve or a bold angle. Sure, it takes a bit more patience and practice, but we think it’s worth every minute.
In this guide, we’ll walk you through the essentials, so you can shape your bonsai with confidence and bring out its full character.
Why We Recommend Wiring (Not Just Pruning)
Pruning definitely has its place in bonsai care—it keeps things tidy and helps the tree stay healthy. But if you want real control over your bonsai’s shape, wiring is where the magic happens.
With pruning alone, we’re limited to the tree’s natural growth patterns. Wiring, on the other hand, lets us shape branches into beautiful curves and angles that pruning simply can’t achieve.
Imagine being able to guide a branch exactly where you want it to go or creating a specific silhouette that transforms your tree’s look entirely. That’s the kind of control wiring gives us. Yes, it takes a little extra time and practice, but the results are worth it.
Choosing the Right Wire for the Job
When it comes to bonsai wiring, not all wire is created equal. Choosing the right type can make a huge difference in both the ease of wiring and the results you get.
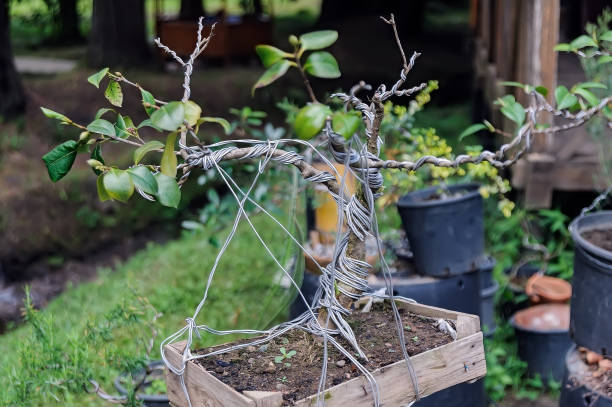
For beginners and seasoned bonsai enthusiasts alike, aluminum wire is a top choice because it’s flexible, easy to handle, and forgiving if you need to make adjustments.
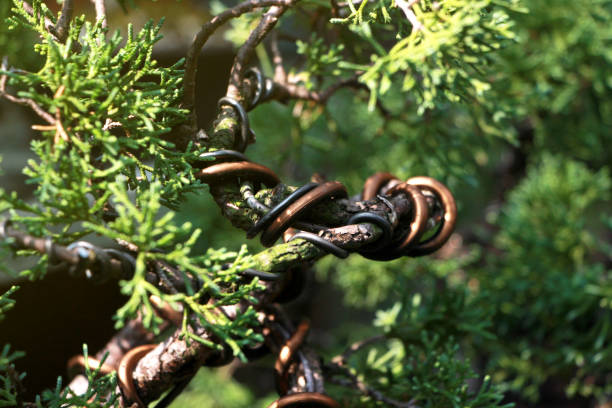
Copper wire is another option, and while it’s stronger and holds its shape longer, it can be a bit tricky to work with, especially if you’re new to wiring.
We’ve found that having a few different wire thicknesses (or gauges) on hand is really helpful. Thicker wire works best for strong, stubborn branches, while thinner wire is perfect for more delicate sections.
Generally, a wire that’s about one-third the thickness of the branch you’re working on is ideal—it’s strong enough to hold the shape but not so stiff that it’s hard to manage.
Best Times for Wiring: Our Seasonal Tips
While wiring a bonsai tree can be done at any time of year, certain seasons make the process much easier, especially for popular species. For most deciduous trees, we recommend wiring bonsai trees in the winter. During this time, trees lose their leaves, allowing us to clearly see the branch structure and plan our shaping more accurately.
Winter is also when growth slows, so branches stay in place longer, reducing the risk of scarring.
Here are a few bonsai species and the best times to wire them:
- Japanese Maple: Winter is ideal, as this deciduous tree sheds its leaves, exposing branches for easy wiring.
- Juniper: Winter and early spring both work well, though it’s good to check the wiring regularly during active growth.
- Chinese Elm: Like the Japanese Maple, winter wiring is best, allowing you to work with bare branches.
- Ficus: Ficus trees grow year-round, especially indoors, so wiring can be done at any time. However, watch for rapid growth in warmer months.
- Pine Bonsai: Late autumn to early winter is ideal, as pines slow down growth but still maintain their needles, allowing for precise shaping.
How to Wrap and Shape Branches Safely
Wrapping wire around bonsai branches might seem intimidating, but with a little patience and a gentle touch, it becomes a straightforward and rewarding part of bonsai care.
Here’s how we approach it to make sure each branch is shaped safely and effectively.
Step #1 Select the Right Wire Gauge
Start by choosing a wire about one-third the thickness of the branch you’re working with.
NOTE: Thicker branches need thicker wire for support, while thinner branches can be shaped with a lighter gauge.
Aluminum wire is usually easier to handle and adjust, especially if you’re just starting out.
Step #2 Anchor the Wire
Begin by anchoring the wire at the base of the trunk or a stable branch when wiring your bonsai tree. Wrap it around the trunk once or twice to secure it. This anchor point provides stability and helps keep the wire from shifting as you work on the branch.
Step #3 Wrap in a Spiral Pattern
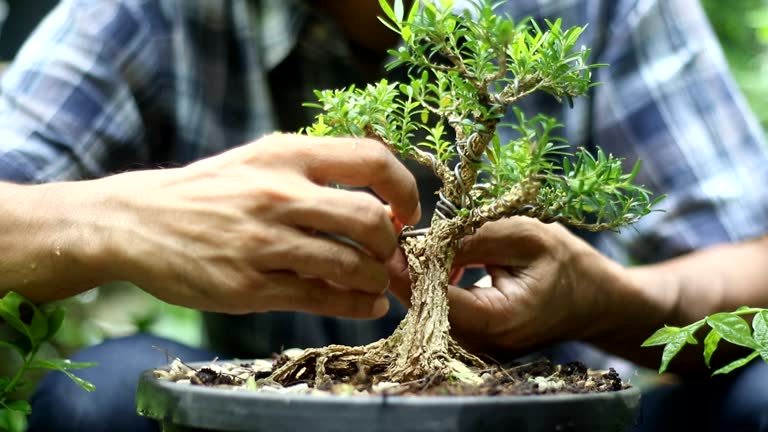
Carefully wrap the wire around the branch in a gentle spiral pattern. Keep a consistent angle as you go, spacing the wire evenly without overlapping. This even spacing distributes pressure and avoids any risk of pinching or damaging the bark.
Step #4 Bend Slowly and Gently
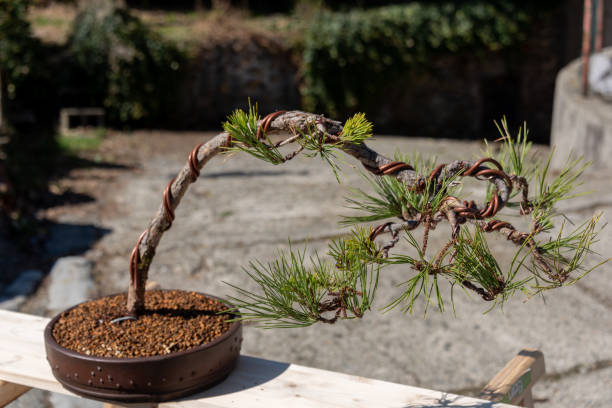
Once the branch is wrapped, it’s time to bend. Apply light, steady pressure as you shape the branch. Avoid forcing it too quickly into position; instead, go slowly to prevent cracks or breaks. If the branch resists, pause and adjust your approach.
Step #5 Check Your Work
Step back and check the overall shape before moving on to the next branch. Does the curve look natural? Are you happy with the direction? Adjust as needed, but remember that minor tweaks are best done over time, allowing the tree to adjust.
Knowing When to Remove the Wire (and How to Do It Right)
After we’ve spent time carefully wiring and shaping our bonsai, the next step is knowing when to take the wire off. Removing it too early means the branches might not hold their new shape; leaving it on too long can cause scarring.
Here’s how we approach this step to ensure our bonsai stays in great shape.
- Monitor for Signs of Growth
The timing for wire removal depends on the growth rate of your tree. For faster-growing species, like Chinese Elm or Ficus, you might need to check the wiring on your bonsai tree every few weeks. Slower-growing species, like Pine or Japanese Maple, can often keep the wire on for several months. When you start to see the bark growing around the wire or notice any indentations, it’s time to remove it.
- Use Wire Cutters—Don’t Unwind
When it’s time to take the wire off, always use a pair of bonsai wire cutters. Trying to unwind the wire risks damaging the branches or tearing the bark. Instead, cut the wire at each turn along the branch and gently remove each piece.
- Work Slowly and Carefully
Removing wire is delicate work. Take your time with each branch, cutting carefully and removing one section at a time. Rushing this step can cause accidental scratches or stress on the branches, undoing the careful shaping you’ve achieved.
- Rewire if Needed
Occasionally, a branch may not fully hold its shape after the wire is removed. If this happens, it’s perfectly fine to reapply the wire and continue guiding the branch’s growth. Just be sure to wait a few weeks before rewiring to give the branch a break.
Our Favorite Tools and Final Tips for Bonsai Success
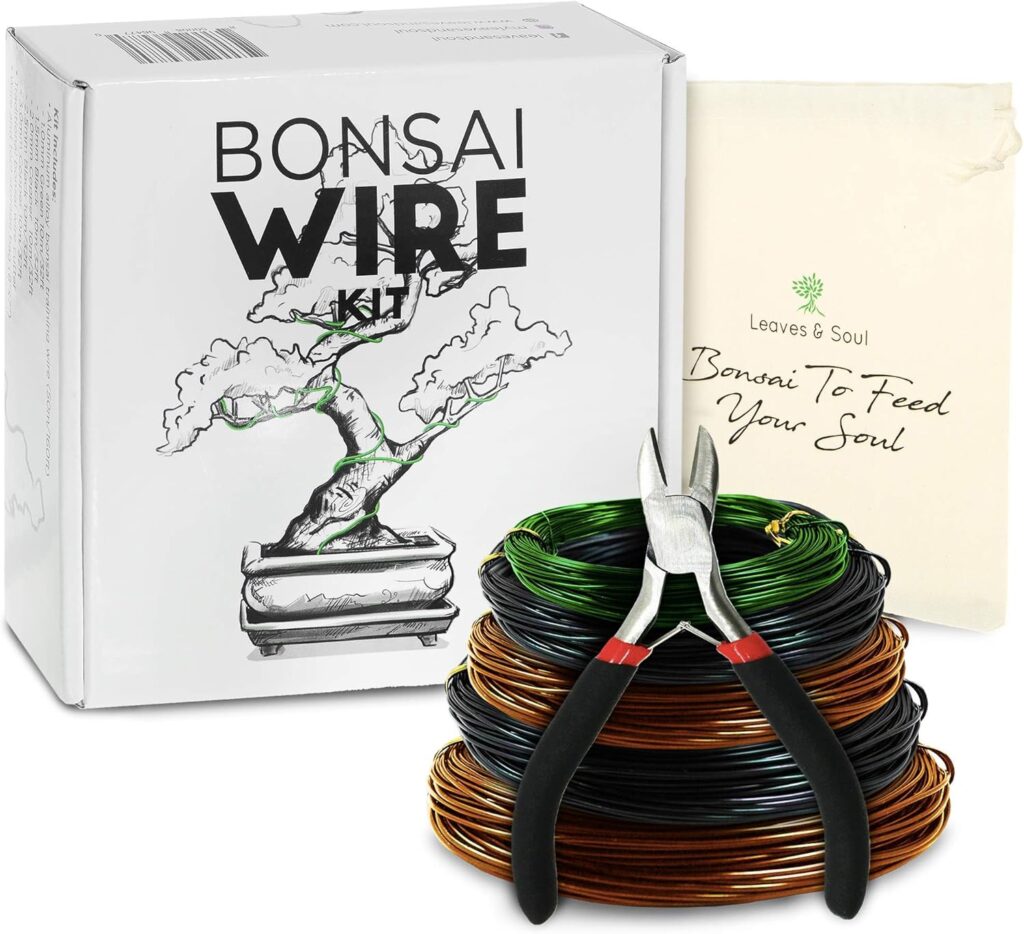
To get the best results in bonsai shaping, having the right tools makes all the difference. One of our go-to products for wiring is the Tree Training Wire Kit – 5 Rolls (160ft) Aluminum Alloy Bonsai Plant Training Wire. It’s an all-in-one kit that’s perfect for beginners and experienced bonsai enthusiasts alike.
This kit includes five different wire sizes, each made of durable yet flexible aluminum alloy, giving us the control we need without the risk of frequent breakage. The aluminum material is also gentler on our trees than copper, which means less risk of scarring while still being strong enough to hold branches in place.
Plus, with 160 feet of wire and a variety of gauges, there’s plenty to work with whether we’re single- or double-wiring our bonsai.
The kit also comes with a traditional bonsai wire cutter and a convenient canvas storage bag, making it easy to keep everything organized and ready for wiring your bonsai tree. We love that this kit allows us to focus on the art of bonsai without worrying about running out of wire or leaving unwanted marks on the branches.
In addition to a quality wire kit, patience and practice are your best tools for bonsai success. With the right techniques and a little time, you’ll be able to shape your bonsai into a work of art that reflects your unique style.
So grab your tools, get hands-on, and enjoy the process of creating something truly special!



0 Comments